
A year or so ago I saw an Instructable on installing LED lighting in a workshop using bulk LED reels. The idea resonated with me: I spend a lot of time in the garage and there is (well, was) never enough light. In New England I used a few 4’ flourescent shop lights, but they weren’t really that bright and struggled with the cold. (I also struggled with the cold.) I’ve been using 4’ LED shop lights down here for a couple of years. They put out good light, but at nearly $40 each, the cost adds up pretty quickly.
We recently had the floor in the garage replaced and it was finally time to make some progress on getting the workshop I really wanted. There are still tons of projects to be done out there (cabinets and insulation and power oh my), but now I can actually see what I’m doing!
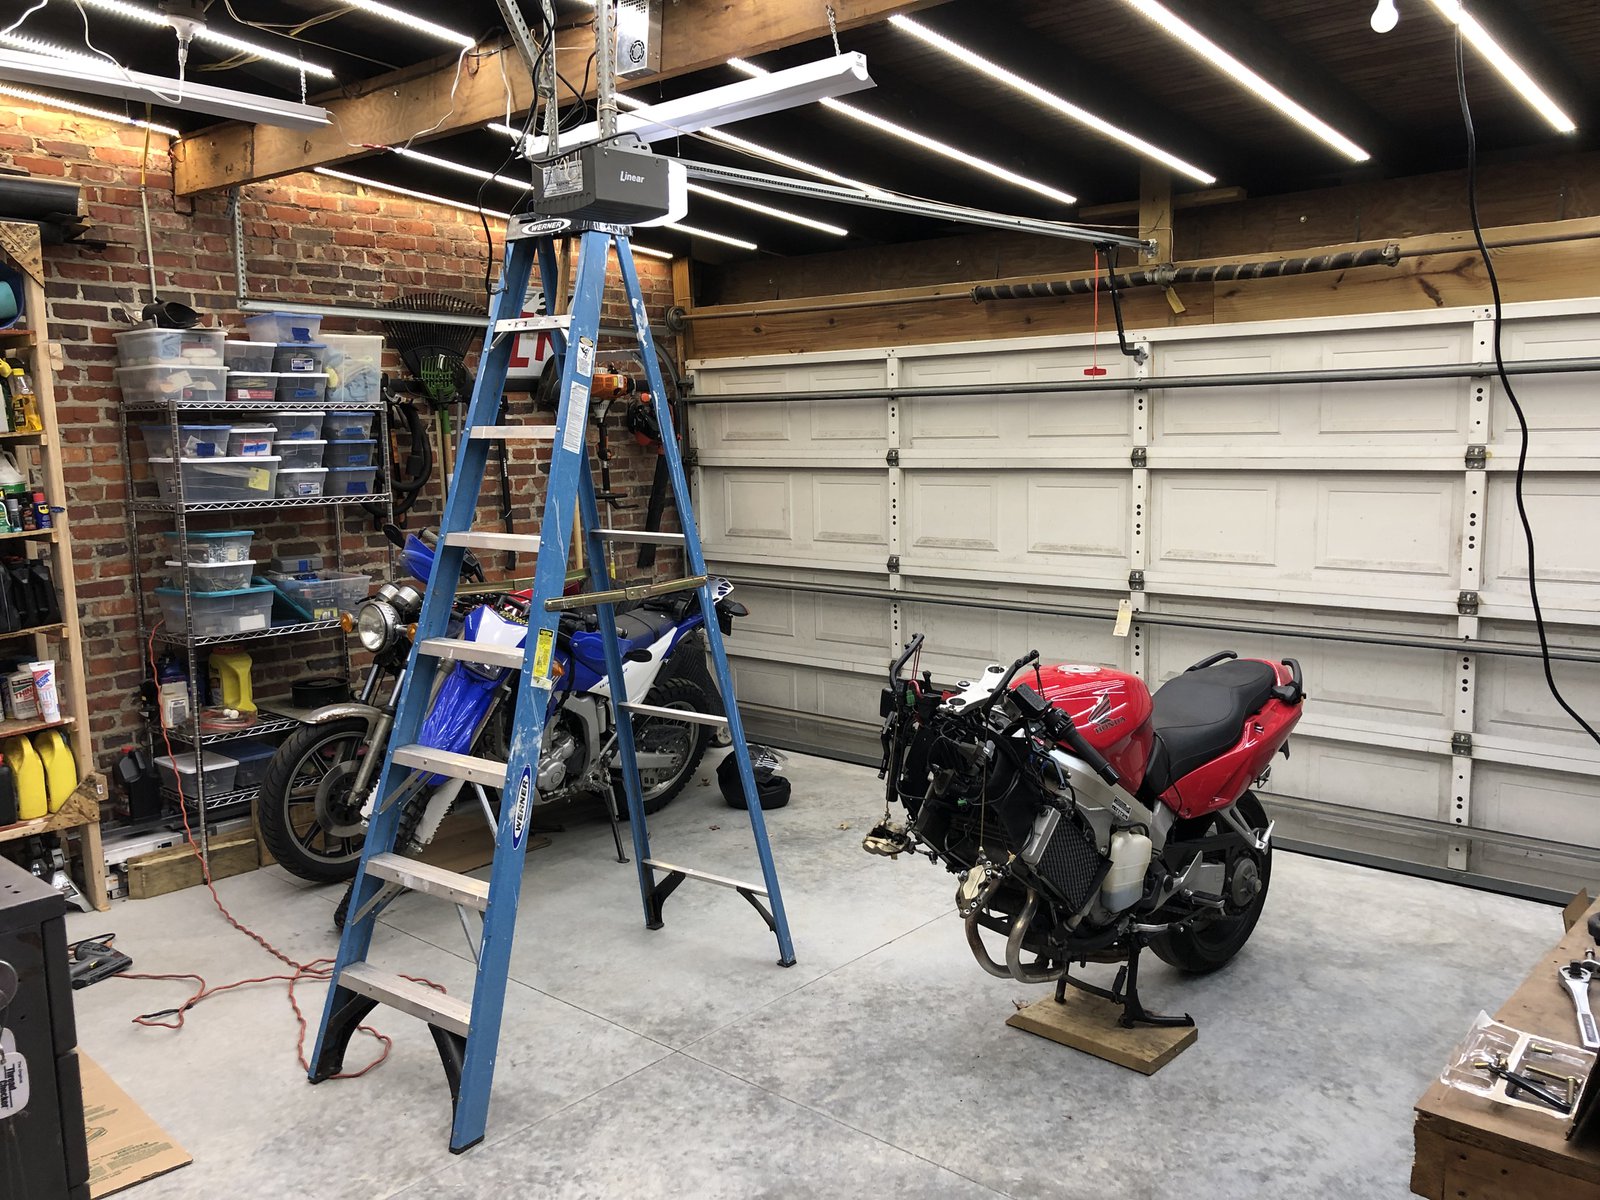
First things first:

(It’s not quite as messy as it appears…)
The garage ceiling is unfinished, with exposed rafters about 24” on center. The house was built in 1926 and the garage seems to have been built around that time, as well. The rafters are dimensional, but rough. The garage measures 18’x18’ inside, with a newer beam running across the center. It’s just a big, empty box.
Blindly copying from the Instructable I chose the same approach of hanging the LEDs to the bottom of the rafters. The LEDs have a tape backing that invites you to think it’s 3M brand (it isn’t), but there’s no way they’ll stick to wood. I spent a fair bit of time walking around Home Depot looking for a suitable backing material to stick the LEDs to before attaching the whole affair to the ceiling. I knew there’d be a fair bit of assembly, and I didn’t want to do it with my arms above my head while standing on at least one ladder. I stumbled upon a full 4’x8’ sheet of Coroplast (like it sounds: plastic sheet like corrugated cardboard) and an inexpensive tool to make cutting along the channels easy. The rafters are about 2” wide, so the single sheet worked perfectly with some left over. I cut 20 ~1-¾” strips – wide enough to fit on the rafter and also accept three lengths of LEDs – and started taping the LEDs down. I tried to do some prep by cleaning the coroplast with alcohol to promote adhesion of the tape, but it was pointless: by the time I finished laying down all the LEDs some were already coming off. I considered hot glue, epoxy, and a few other things, but ultimately ended up wrapping clear packing tape around the LEDs and coroplast every couple of feet. It feels like a pretty kludgy solution, but so far is holding up well.
I followed the lead of the Instructable author and chose a 2:1 ratio of cool white to warm white LEDs.
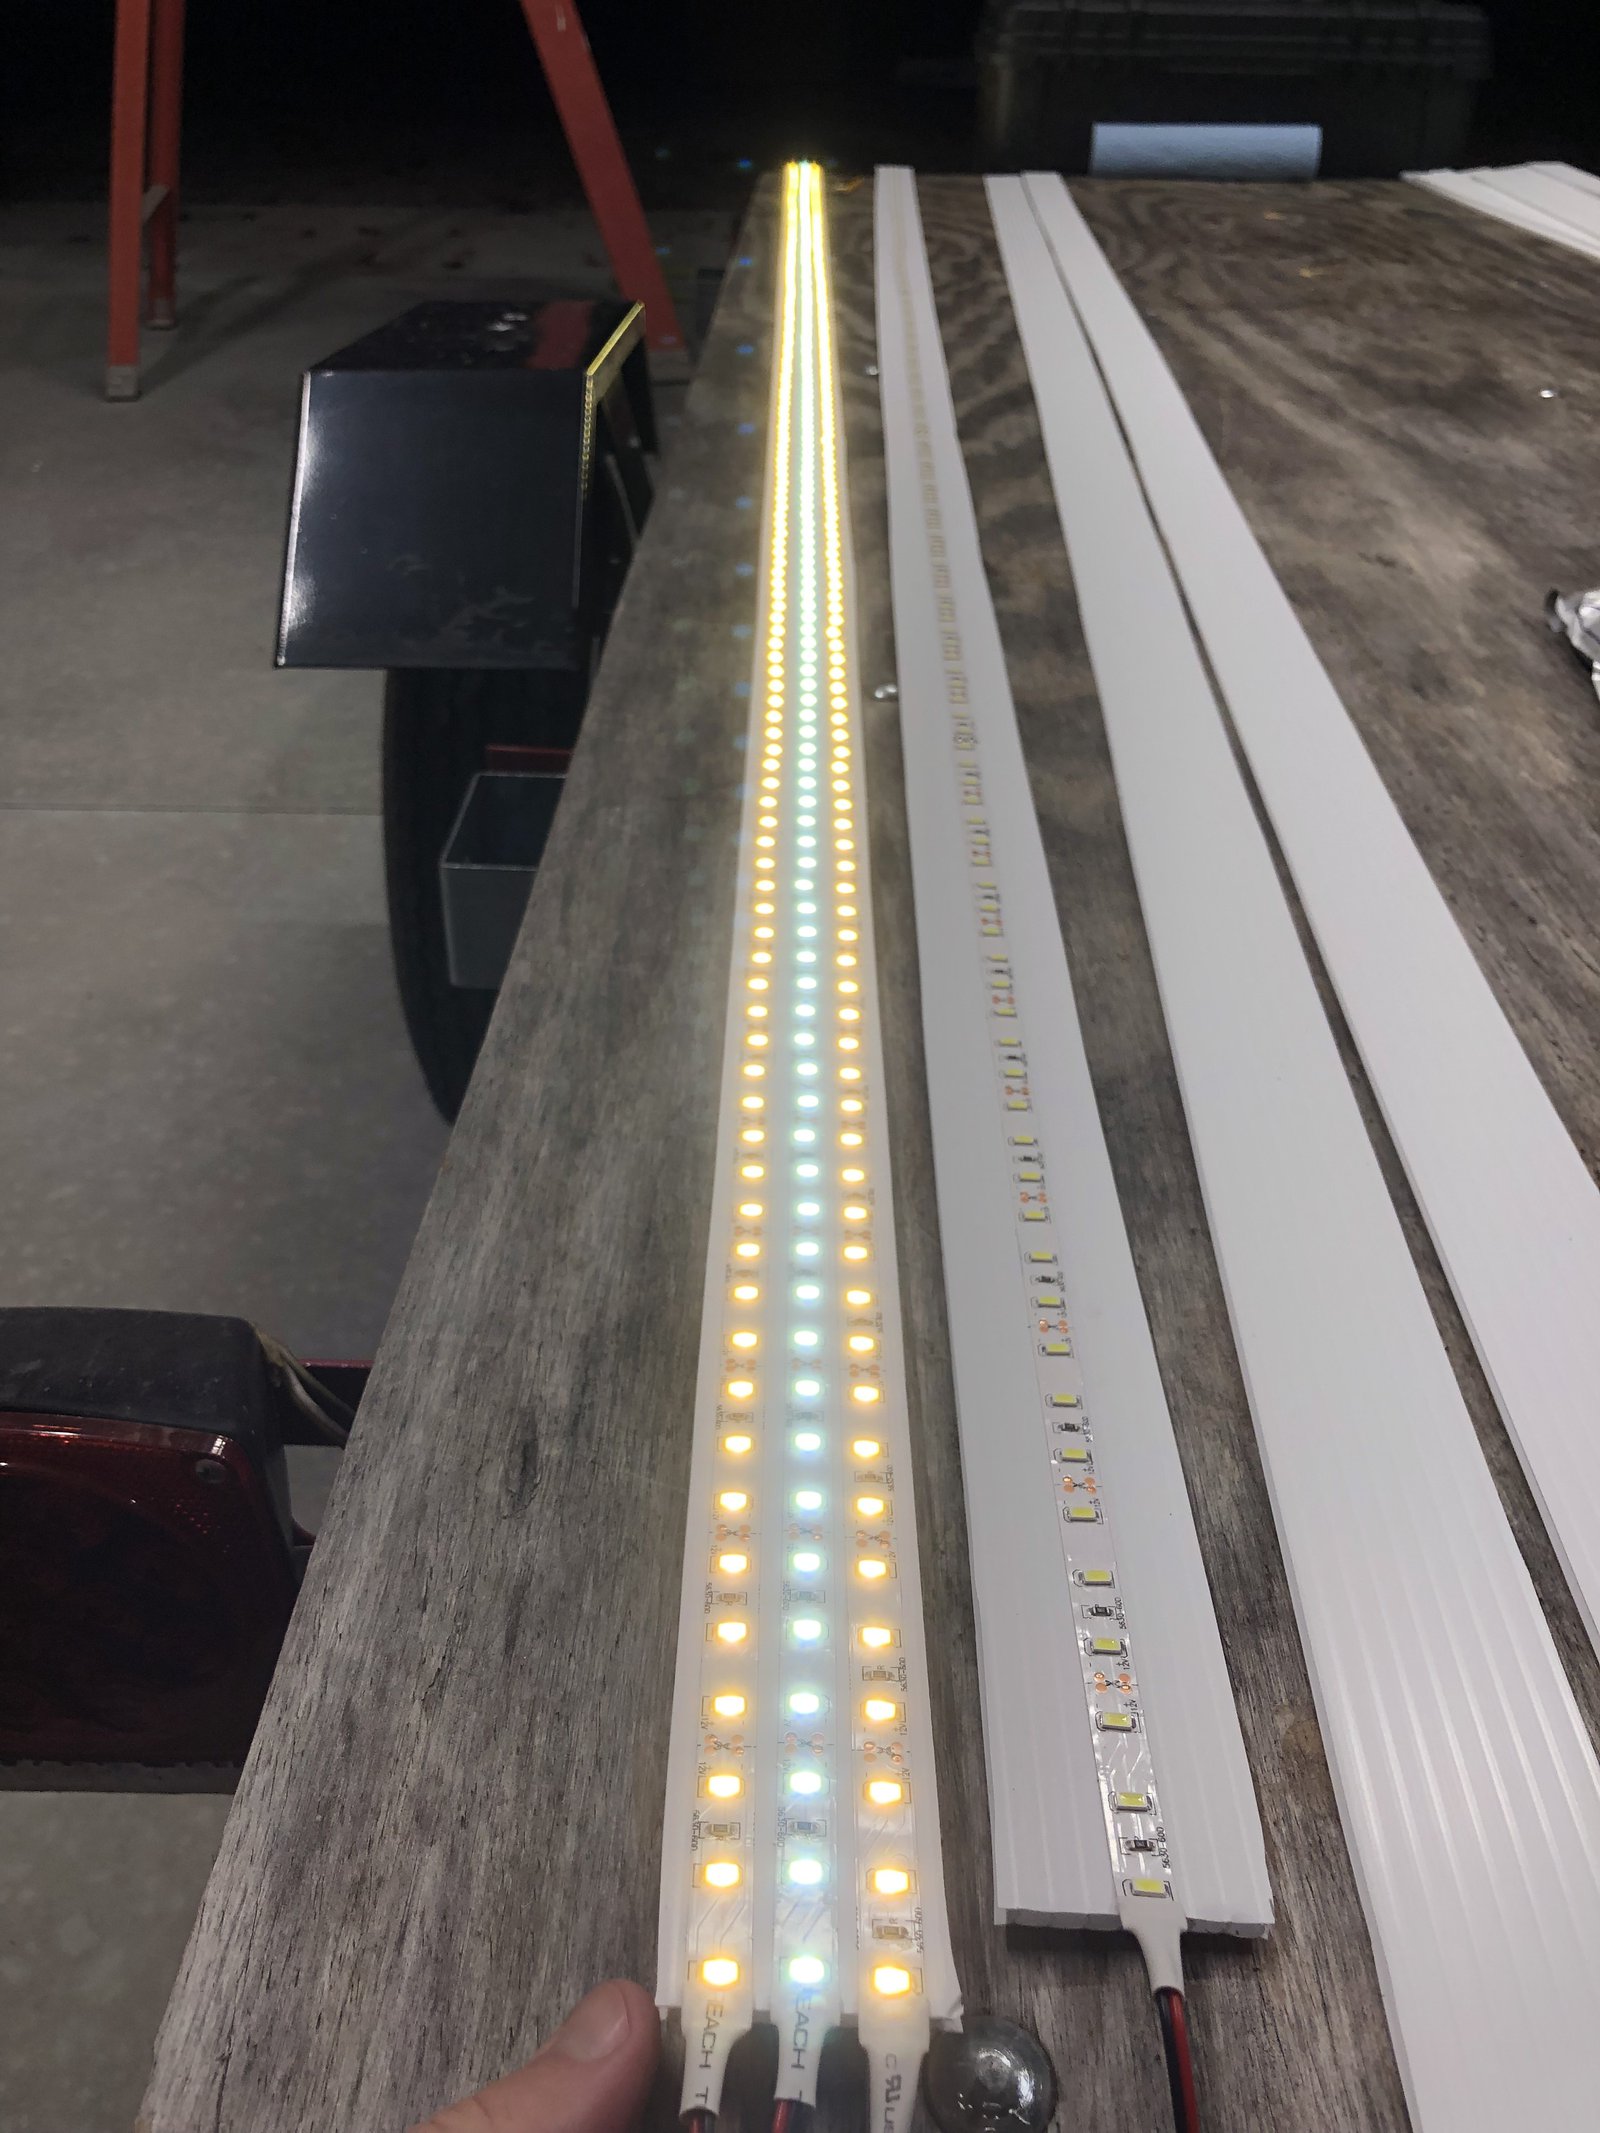
Unfortunately I screwd up the very first section by doing cool/warm/cool instead of warm/cool/warm, and the end result is that the two outer-most rafters have slightly different light than the others. I guess it’s a feature to show the difference? I’m sure after a couple of years I’ll stop twitching whenever I notice it.
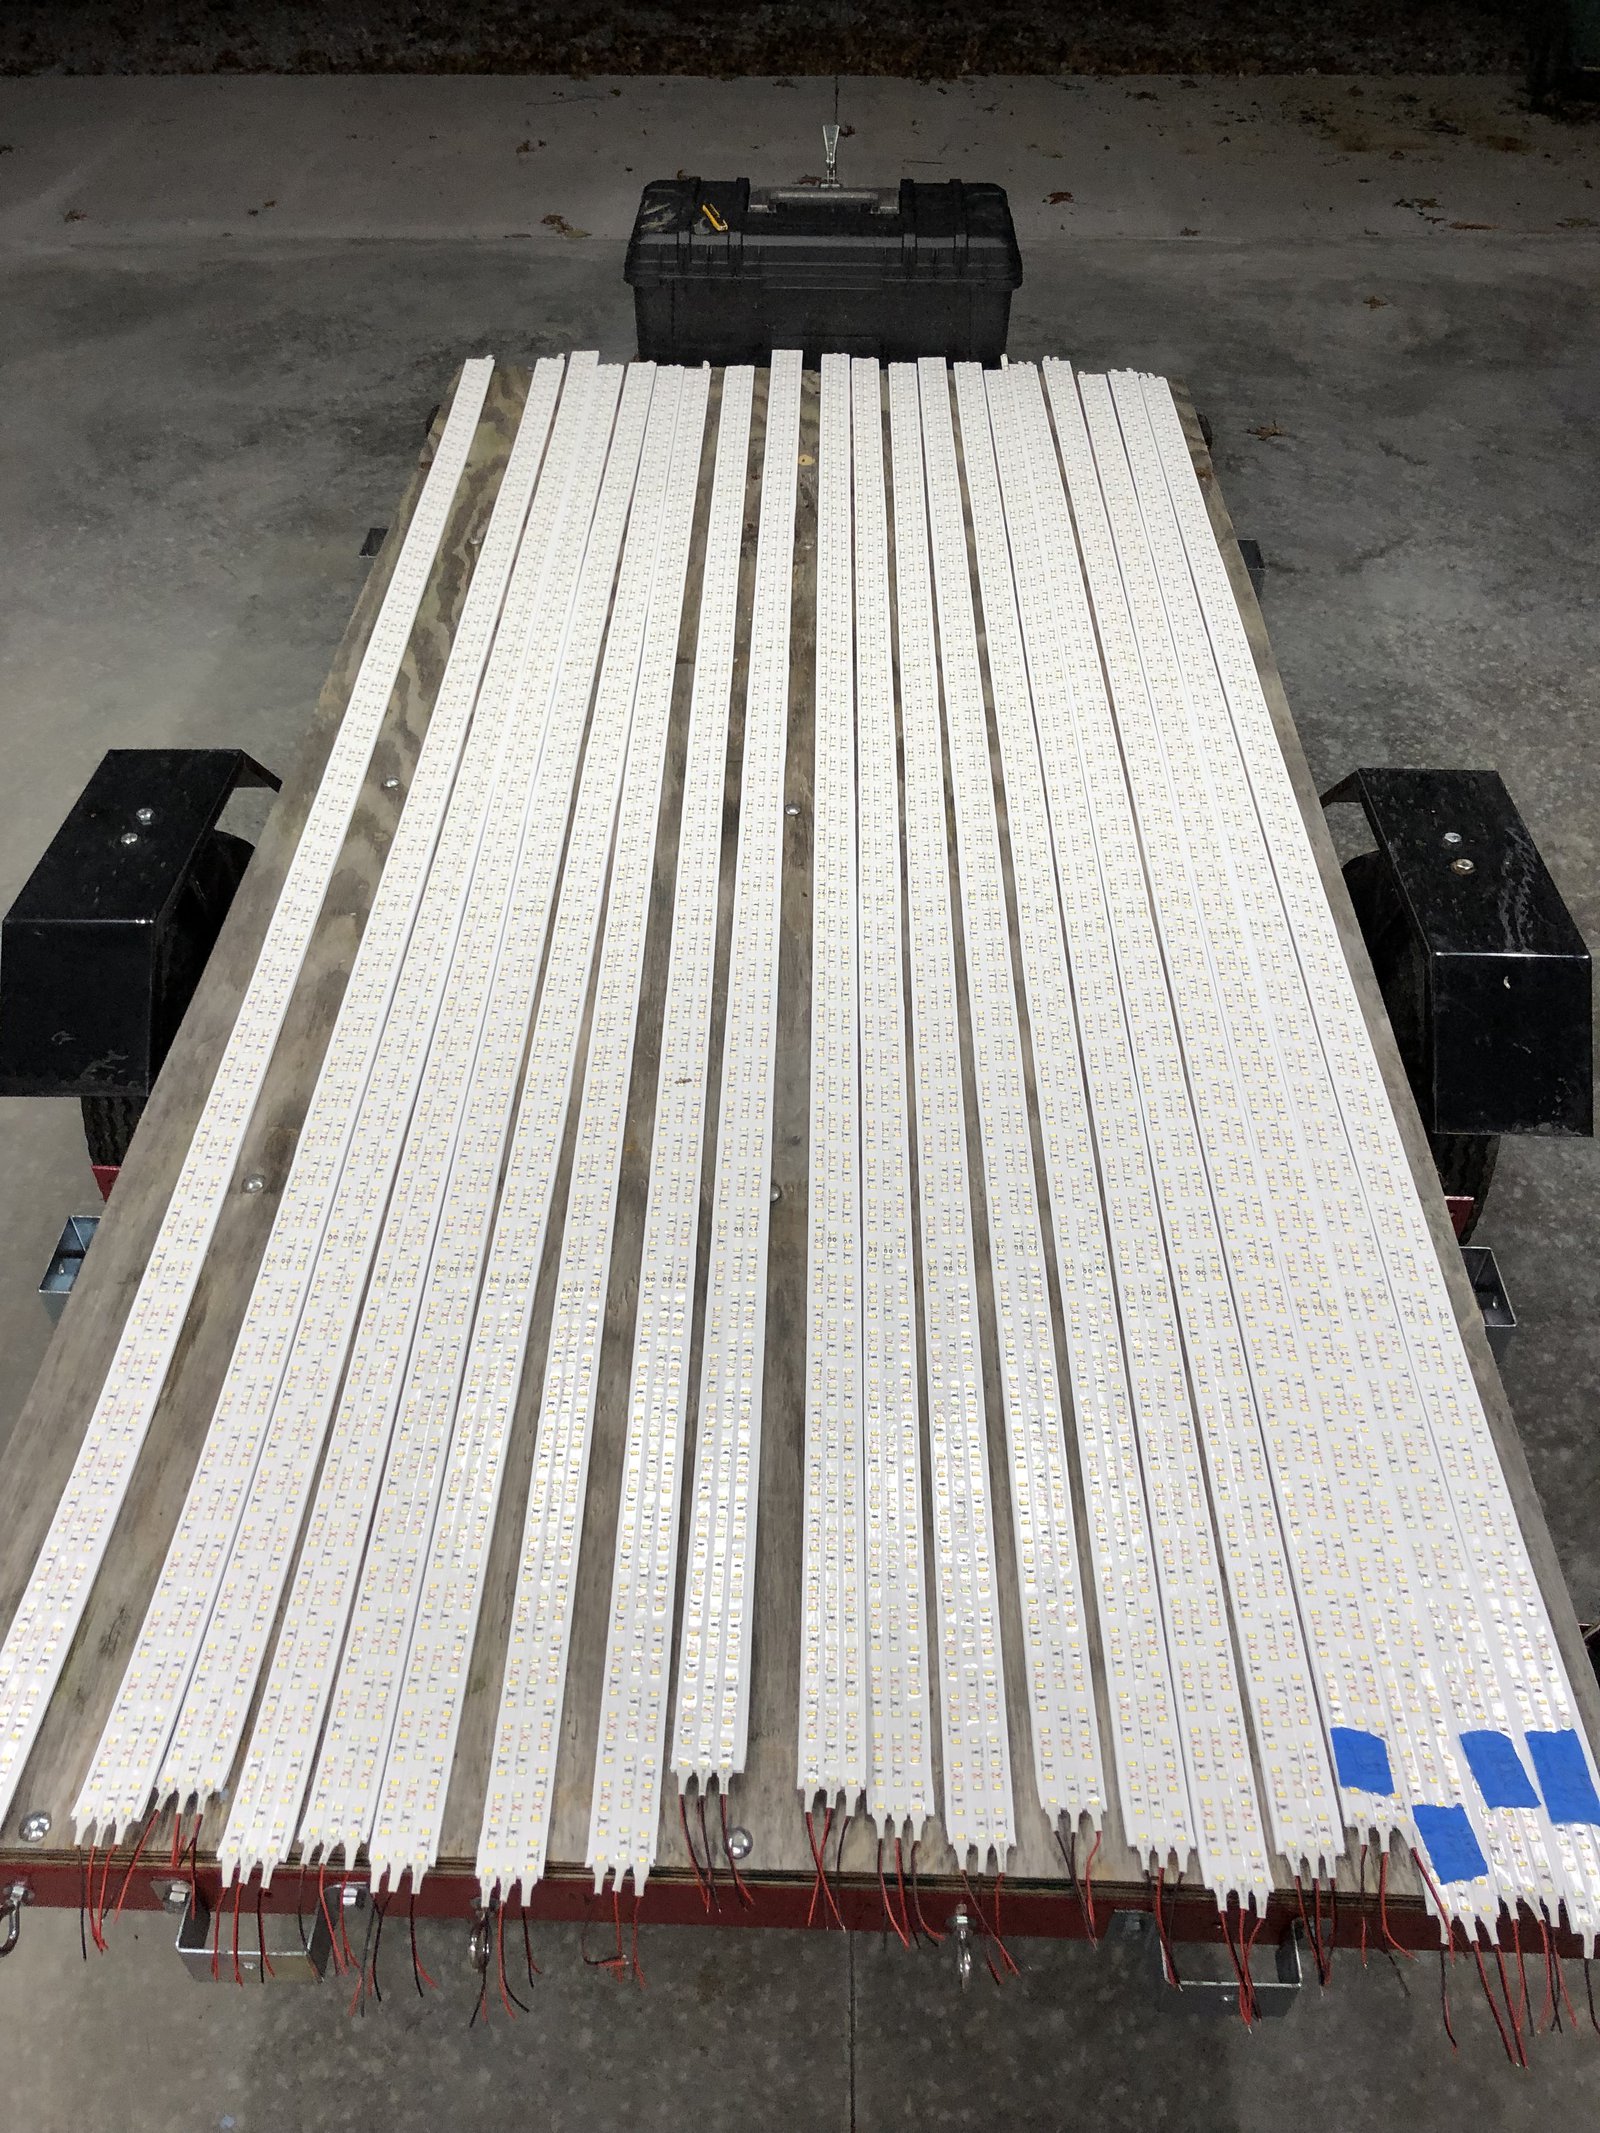
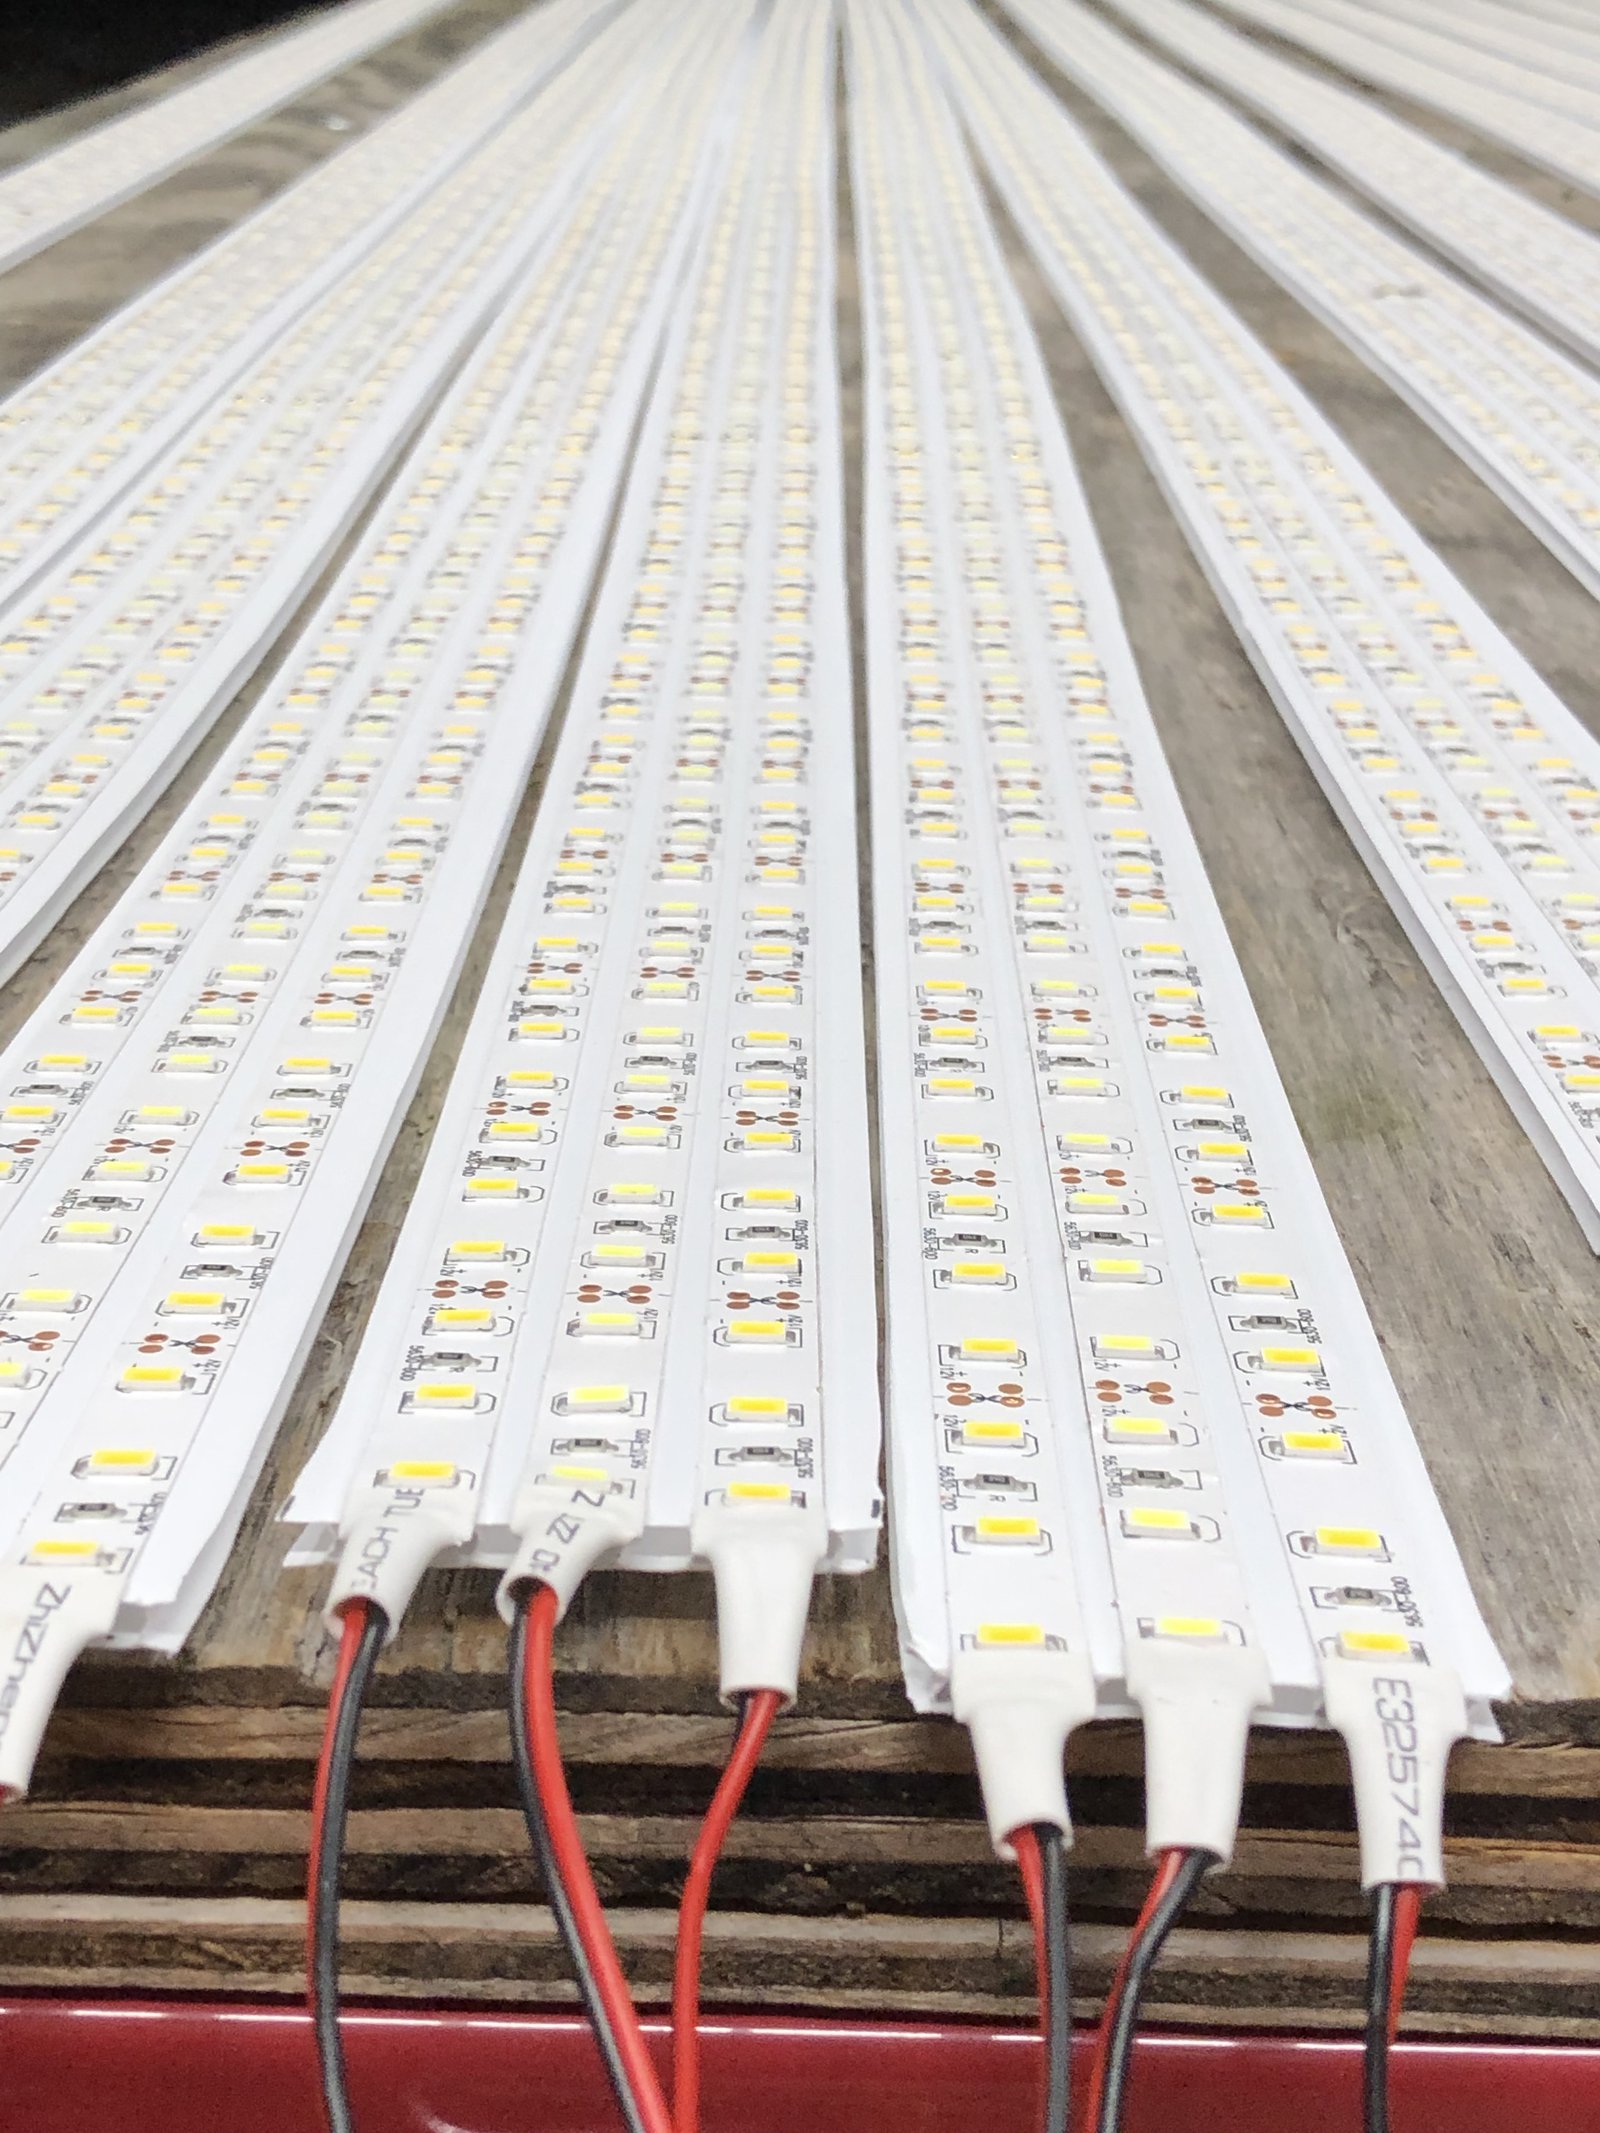
After getting the 20 sections of coroplast adorned with the LEDs I went back to each and gathered the wires into bundles, 3 red and 3 black, soldered and heat-shrunk them together, to end up with a single 16ga pigtail. I tested each to make sure I didn’t permanently glue any dead strips to the ceiling. After adding the packing tape, they were ready to go onto the ceiling.
To make wiring everything up easier, I used the central beam as the center of the project, with each LED section’s pigtail up against it. This allowed for centralizing the final wiring runs and power supplies. I ran a zigzag bead of construction adhesive to the back of each each strip, precariously perched myself across two different ladders, and stuck each strip to a rafter. I was initially nervous they wouldn’t stick, but after the first one held on, I knew the rest would be no problem.
Once the strips were in place I figured out where the power supplies would go and started linking each strip together with 14/2 landscaping wire and wire nuts. The first half went pretty quickly and the results were promising:
It was about this time that the first power supply died. I originally bought two cheap “eTopxizu” 12V 30A power supplies, but neither lasted longer than 30 minutes before shutting down and fouling the air with the stench of burning electronics. I knew it was a gamble to buy something so cheap from Amazon, especially with a brand name apparently resulting from a cat walking across a keyboard, but I thought if I bought them with a large enough current capacity I’d be safe. I was not. The fan stopped spinning on the first one and a short time later darkness descended, bringing with it the stench of scorched electronics. The 2nd supply lasted nearly as long as the first and then died with a sizzling noise that made me dash for the light switch and wonder where the hell my fire extinguisher was. Lesson learned. Two days later Amazon delivered a pair of higher-capacity Mean Well power supplies that are sold by reputable distributors like Digi-Key and have honest-to-god datasheets.

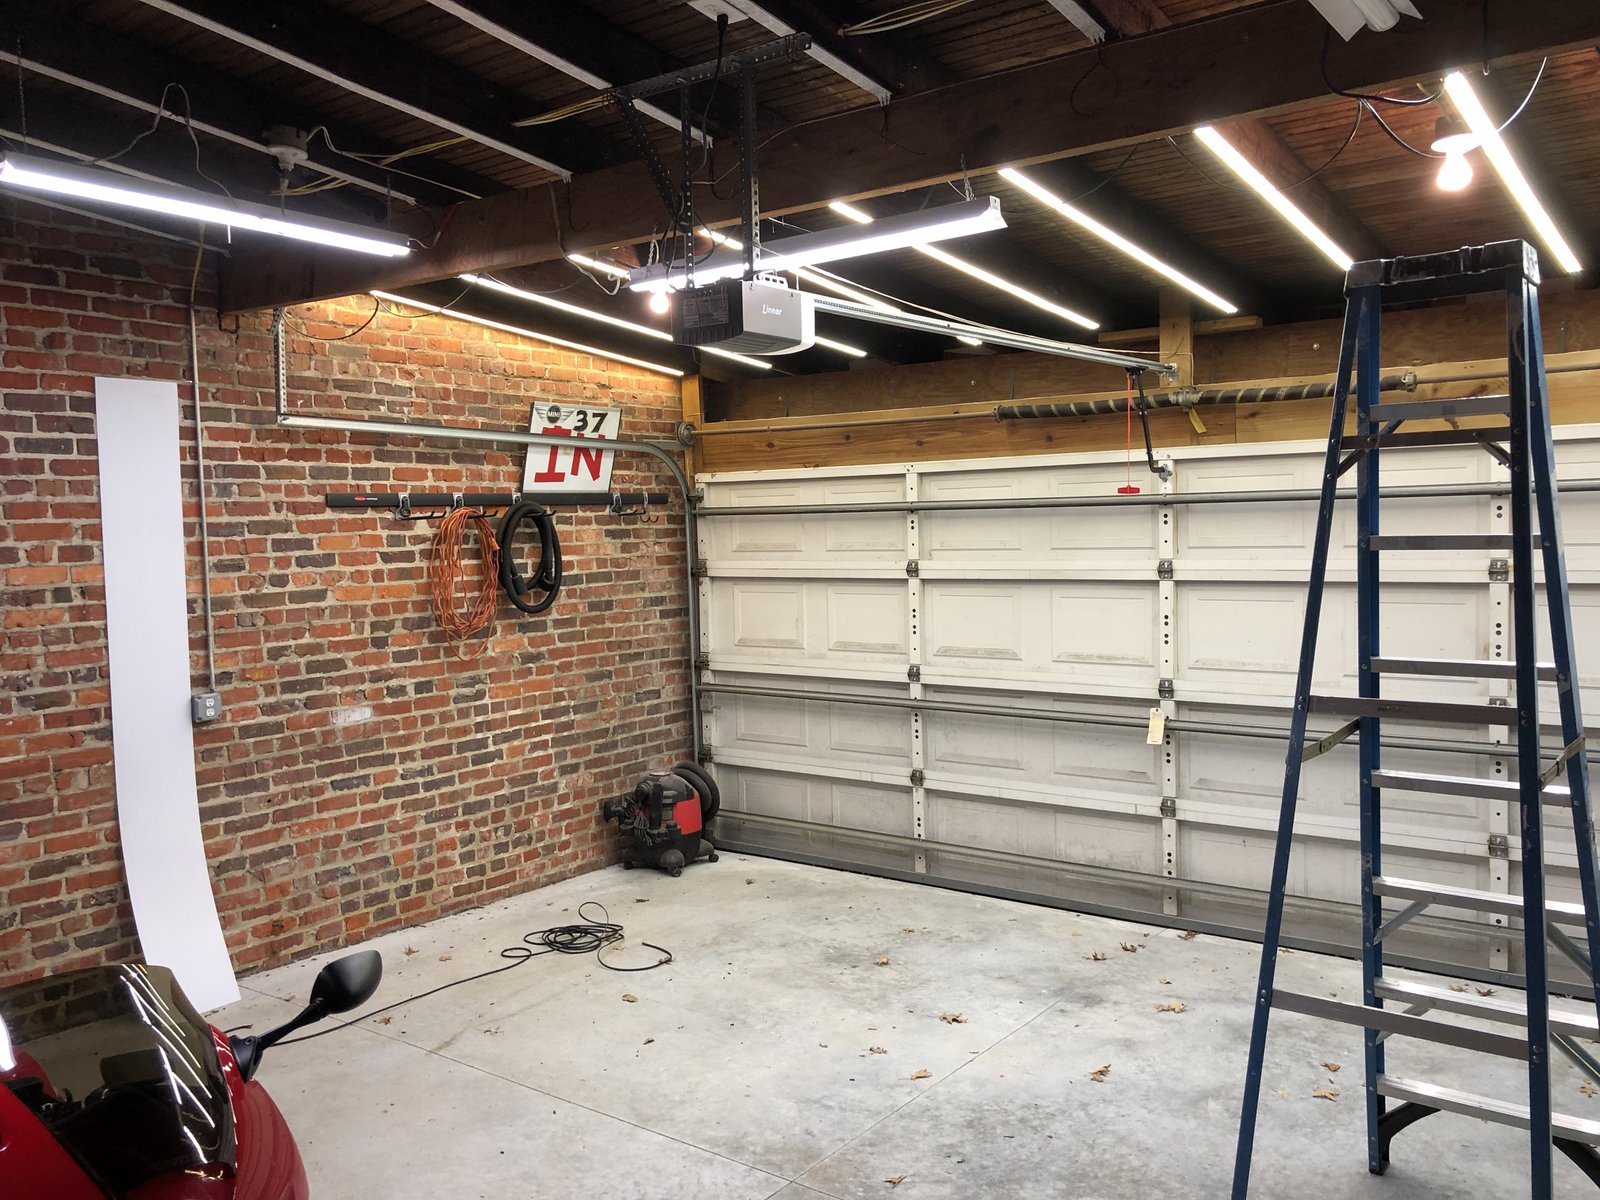
The remainder was a repetition of the first (with a brief interlude to partially disassemble a motorcycle), and now it’s done!

When things start to warm up again I’ll add more lights to the back of the garage door so that it can act as a light source, instead of shading the front half of the garage. I have a couple of ideas of how to do that, including a relay to switch off the obscured lights when the door goes up.
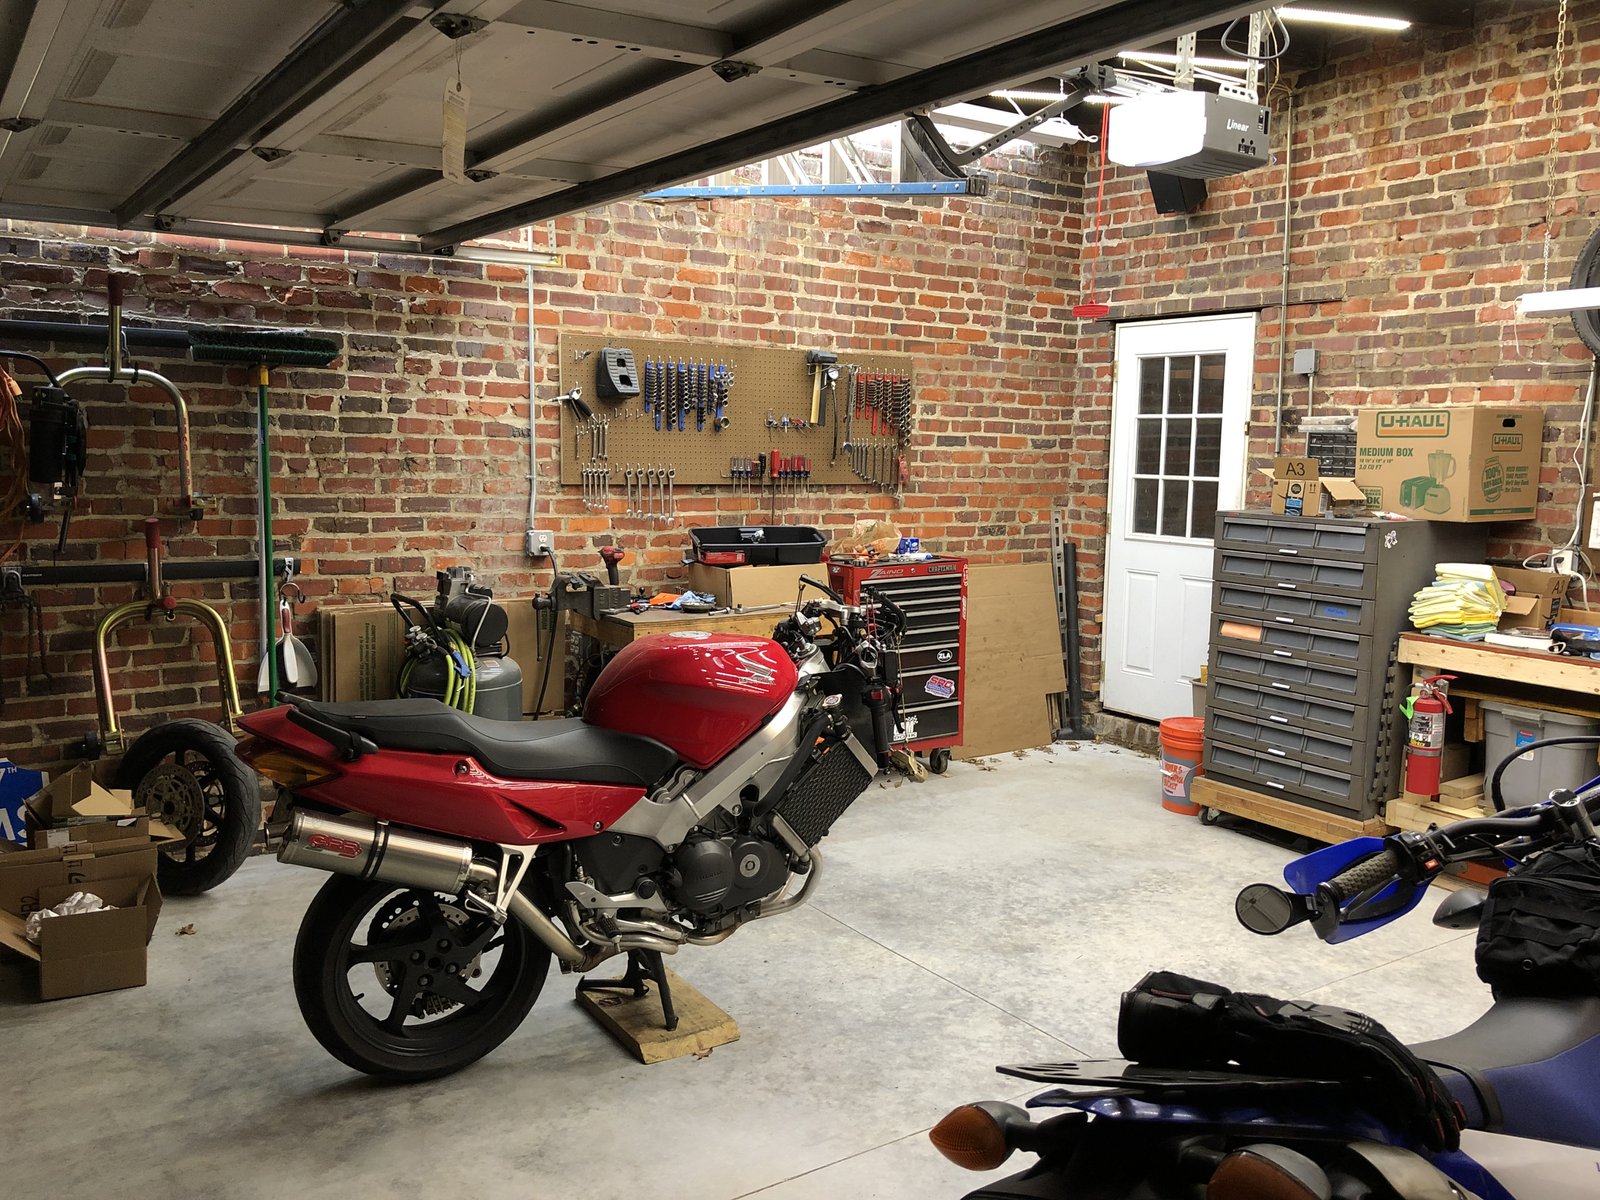
I have a little more cleanup to do, including removing the old lights and neatening some wiring. I’m delighted with the result. The light is bright and even and stretches from wall to wall. There’s a bit of a dark edge at the back of the garage, but that’s compensated for by the separate light I’ll keep over the workbench, and eventually I’ll have a loft or cabinets at the front. I literally cannot cast a shadow, and there’s enough light bouncing off the floor that I didn’t need any other light source while working on a normally dark corner of the VFR last night.
Power calculations
The LEDs consume 4 watts/meter. Each of the 10 rafters has two 8’ sections of coroplast with 3 parallel strips of LEDs. So each half of the garage has:
10 rafters * 8' section = 80' → 24.38m
24.38m * (4W/m * 3 LED strips/section) = 292.56 watts
292.56 watts @ 12 volts → 24.38 amps
292.56 watts @ 120 volts → 2.43 amps
Even accounting for losses in the power supplies, that’s still something like the power needed to light 3 100W incandescent bulbs!
Materials
| item | quantity | price/ea | total |
|---|---|---|---|
| 5m reel of SMD5630 LEDs, warm white | 22 | $3.59 | $78.98 |
| 5m reel of SMD5630 LEDs, white | 11 | $3.59 | $39.49 |
| Loctite Power Grab Ultimate Construction Adhesive | 2 | $6.77 | $13.54 |
| 4’x8’ sheet of Coroplast | 1 | $19.98 | $19.98 |
| tool for cutting Coroplast | 1 | $13 | $13 |
| packing tape | not much | ||
| staples | a bunch | ||
| 16ga wire | 20*6”ish? | ||
| heat shrink tubing | some | ||
| 50’ 14/2 low-voltage landscape lighting wire | 1 | $26.86 | $26.86 |
| wire nuts | 40 | $3ish? | |
| Mean Well SE-450-12 power supply | 2 | $61.95 | $123.90 |
| Power tool replacement cord | 2 | $12.97 | $25.94 |
Total cost: $344.69
Hm, well that’s a little more than I thought. But that’s a price of $2.15 per linear foot of light, compared to nearly $10/foot for the commercial fixtures. I think I’m gonna quit while I’m ahead and not calculate the actual light output per foot…